Contents
Let’s skip the vague advice. You’re flying 8-14 hours, cabin humidity sitting at 10-20%, and you need to land looking sharp – not like your jacket just survived a rugby scrum in the overhead bin.
The real issue isn’t “Do I bring a garment bag?”
It’s this: How much structure do I need to control pressure, friction, and fabric memory over time?
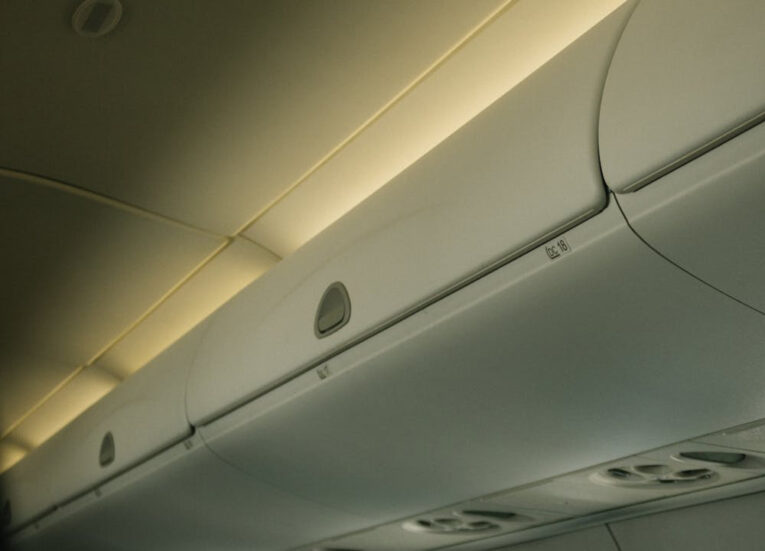
Overhead bins curve inward by 1-2 inches. Other passengers stack bags late. That’s 10-25 lbs per layer, sometimes 15-40 lbs pressing downward. Leave wool under that pressure for more than 3 continuous hours in dry air and hydrogen bonds in the fibers literally reset in the bent position.
That’s what you’re fighting.
Below is exactly how to decide – and how to execute it properly.

Option 1: Soft Garment Sleeve in a Carry-On
Low structure. Low protection. Works only under specific conditions.
Most sleeves are 40-44 inches long. If they don’t have internal reinforcement panels at least 2-3 mm thick (fiberboard or HDPE), they bend at two predictable points:
- Mid-torso (12-16 inches from the shoulder seam)
- Mid-thigh (18-22 inches from the collar)
Once in the overhead bin, that sleeve becomes part of a compression stack. If your bag is in the bottom 20% of the pile, it’s carrying everyone else’s packing decisions for 6-10 hours.
When This Can Work
It’s reasonable only if all three are true:
- Total cabin time under 4 hours
- Fabric is high-twist wool (Super 110s-130s, fiber diameter 18-19 microns)
- You can hang the garment within 15 minutes of hotel arrival
How to Do It Properly
- Board within the first 50% of boarding groups. Boarding order matters more than brand choice.
- Place the sleeve in the top 20% of the bin stack.
- Insert 3-5 sheets of acid-free tissue (minimum 17 gsm) along fold lines.
- Leave 0.5-1 inch slack in compression straps – don’t crank them tight.
- Use a wooden hanger that matches shoulder width within ±0.5 inches.
- Fold trousers at the natural break point 16-18 inches from hem, never at the knee.
Why Wrinkles “Set”
Wool contains keratin. Under 10-20% humidity and pressure beyond 3 hours, hydrogen bonds reform in the bent position. Resetting them later requires 212°F (100°C) steam for 10-20 seconds per section – not a quick pass.
When This Fails
If you board in the last third, get gate-checked (cargo compression can hit 30-60 lbs), or you’re traveling with linen (0% elasticity recovery), silk satin (shows marks after 1-2 hours), or structured satin with boning.
If that sounds risky to you, it probably is.
Option 2: Structured Carry-On Garment Bag
High control. Predictable structure. Sacrifices packing space.
These usually measure 20-22 inches wide × 14-16 inches high × 7-9 inches deep and include a rigid spine panel (polycarbonate or reinforced ballistic nylon). The important part: the backing should withstand 30-50 lbs of distributed load without flexing more than 0.5 inches.
That half inch matters.
Instead of 15-30 lbs collapsing one crease line, pressure spreads across 200-300 square inches.
What to Look For
- Dual compression straps (horizontal + diagonal), adjustable in 0.5-inch increments
- Hanger clamp with at least 1-inch foam padding
- Fully sealed zipper track (no fabric protruding beyond 0.25 inches)
- Reinforced corners (minimum 600D ballistic nylon)
Packing It the Right Way
- Button every jacket button.
- Add a 0.5-1 mil dry-cleaner plastic layer between folded sections (reduces friction coefficient ~40%).
- Roll trousers into a 3-4 inch diameter roll if dimensions allow.
- Insert 2-3 tissue sheets inside sleeve caps.
- Keep fold parallel to side seam within ±1 inch.
- For double-breasted jackets, fold along side seam – never through the button line.
- Keep 2 inches on either side of lapel break free from compression.
When This Is the Right Call
- Flight longer than 5 hours
- Arrival-to-event window under 6 hours
- You’re carrying one primary outfit
Tradeoff: this occupies your 22 × 14 × 9 inch carry-on allowance. Personal item must fit under 18 × 14 × 8 inches. Laptop bag should weigh under 3 lbs to stay manageable.
If you want structure and storage in one compliant bag, the hybrid route makes sense.
Option 3: Garment Duffel Bag
Best for speed + structure without checking luggage.
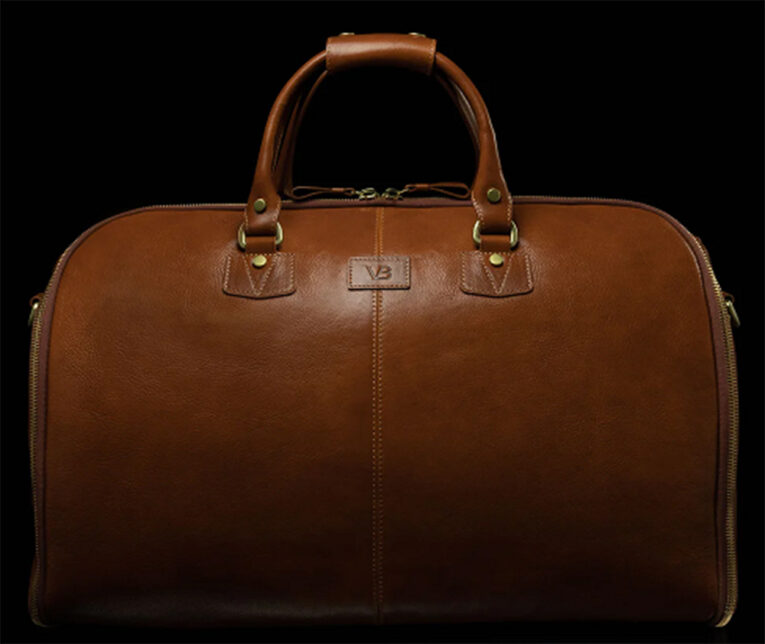
These open flat (40-45 inches long), then zip into a cylinder roughly 20-22 inches long × 10-12 inches diameter. Your suit wraps around a 5-6 inch fold radius.
That curve reduces localized fiber stress by roughly 30-50% compared to a sharp 1-inch fold.
According to Von Baer: “garment duffel bags are best when you don’t want to wait at the luggage carousel.”
And they’re right. If you don’t want to lose 20-45 minutes at baggage claim, this is your compromise.
Pack It Precisely
- Jacket outer panel against bag wall
- 0.5 mil barrier between garment and shoes
- Trousers wrapped around jacket, not inside
- Shoes in structured pouches, heels outward
- Fill gaps with soft knitwear totaling 1-2 lbs
- Keep total load under 15-20 lbs
- Do not exceed 80% interior capacity
More than 5 lbs radial force inside the cylinder and that nice curve becomes a hard bend.
Best Use Case
- One suit + 1-2 shirts
- One formal dress + heels
- Trips under 4 days
- Carry-on weight under 22 lbs
- Flights under 12 hours without cargo transfer
If control and speed matter more than absolute flatness, this is strong.
Should You Ever Check a Suit?
Emotionally? It feels reckless.
Statistically? Mishandled baggage rates sit under 1% per passenger on major carriers. Most delays resolve within 24 hours.
But if your event begins within 12 hours of landing, that 1% feels bigger.
If You Check It, Do It Right
Use a polycarbonate hard-shell (minimum 2 mm thickness, rated for 100-150 lbs distributed pressure).
Pack this way:
- Button jacket
- Turn inside out (reduces surface friction ~25%)
- Tuck one shoulder into the other
- Lay flat against base
- Trousers full-length if case >28 inches
- Insert 3-5 tissue sheets at folds
- Add plastic between layers
- Shoes toe-to-heel at perimeter
- Fill empty space so movement is under 0.5 inches
This is reasonable if:
- You have 12-24 hours before the event
- Hotel pressing turnaround under 4 hours
- You’re traveling with multiple outfits
If the timeline is under 6 hours, don’t check your primary garment.

Folding: The Real Technique That Prevents Damage
Wrinkles form from pressure + friction + dryness. Folding alone isn’t the villain.
- High-twist wool (17-19 microns) rebounds well
- Linen elasticity recovery under 3-5%
- Silk shows pressure marks after 1-2 hours under more than 5 lbs load
Suit Folding Method
- Button fully
- Lay face down
- Fold right shoulder inward
- Tuck left shoulder into cavity
- One lengthwise fold
- Avoid second fold unless suitcase under 24 inches
Align fold within ±1 inch of seam lines.
Insert 2-3 tissue sheets inside sleeve head.
Keep lapel break flat for 3 inches.
Limit compression to under 12 hours if possible.
Dress Handling
- Fold structured dresses at waist seam only
- Roll bias-cut silk around a 2-3 inch tissue core
- Insert 17-20 gsm acid-free tissue between beadwork layers
- Avoid compression straps applying more than 5 lbs downward force
Steam: Hotel vs Bring Your Own
Hotel irons produce 10-30 grams steam per minute. Some leak mineral spots above 350°F.
Portable steamer specs:
- 120-240V
- 1-2 lbs
- 20 seconds continuous steam
- Stainless soleplate
- Heat-up under 90 seconds
- 800-1200 watts minimum
Steam Technique
- Hang garment
- Steam from inside lining first
- Hold 1-2 inches away
- Move vertically 1-2 inches per second
- 10-15 seconds per crease section
- Cool 5-10 minutes before wearing
Fibers reset as they cool below 100°F internal temperature.
Shower Method (Only for Light Wrinkles)
- Water 120-130°F
- Run 10-15 minutes
- Garment 18 inches from water
- Effective only for wrinkles under 1 mm depth
If the event is important, bring your own steamer.
Climate Changes Everything
- 60-80% relative humidity: creases soften within 4-8 hours
- Below 30% RH: wrinkles persist
Cabin humidity sits at 10-20%. Hang within 10-15 minutes of arrival.
Let gravity work 30-60 minutes before steaming.
Landing above 5,000 ft altitude? Increase steam duration 20-30%.

If You’re Carrying Only One Outfit
You lower risk by distributing exposure.
- Carry it onboard
- Bring 1-2 lb steamer
- Pack backup tie under 0.5 lbs
- Photograph garment before packing
- Spare shirt in personal item
- For multi-day events, split garments across 2 bags
- Keep per-bag garment value under 50%
Your event may last 1-3 hours. Packing stress shouldn’t dominate that window.
The Small Details That Make You Look “Unpolished”
It’s rarely catastrophic wrinkling.
It’s:
- Lapel flattened more than 0.5 inches
- Sleeve head collapse
- Faint line 12-18 inches above hem
- Twisted strap
Prevention Routine
- Insert 2-3 tissue sheets at fold points
- Keep overhead bag under 80% capacity
- Hang within 15 minutes of arrival
- Steam 15-30 minutes before dressing
- Brush 10-15 strokes per panel
- Inspect under vanity LEDs
- Let garment rest 10 minutes after steaming
- Tug hem downward 2-3 times
- Avoid sitting for 10 minutes after dressing
You’re not trying to eliminate every crease.
You’re trying to eliminate distraction.
Choose based on timeline, fabric micron count, number of outfits, and how much uncertainty you’re willing to tolerate.
Handle the physics before you board.
Then when you walk into that room, you’re thinking about the conversation – not your sleeve.